Table of Contents
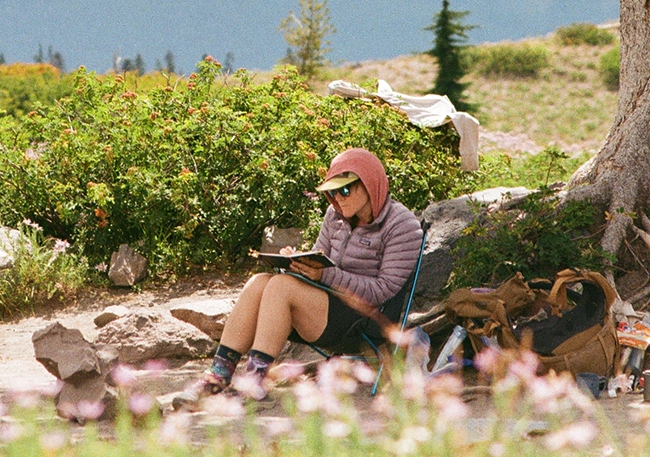
Make Art Outside!

You don’t need advanced drawing or painting skills to make art outdoors. All you need is curiosity, an open mind, and some basic art supplies. Sitting in nature has many health benefits, and adding an art practice multiplies those rewards. Making art, even doodling, has been shown to reduce stress and improve mood. When we look at something and spend time to notice the shape, colors, and details, we engage in mindfulness. Connecting what we see and feel to what we put on paper helps seal it in our memories. This guide is meant to get you out the door and started with your sketchbook.
Terms for Outdoor Sketching
There are many ways creative and curious folk make their art outdoors. All you need to get started is a surface and something to make marks with. I focus on ink and water soluble mediums like watercolor because that is what I am familiar with, but your kit can be customized to your preferences.
Plein air: Painting outdoors from nature, usually trying to capture a scene or atmosphere.
Field sketching: Sketching and annotating data on specific subjects observed outdoors. May include nature journaling.
Nature Journaling: Writing and sketching that focuses on observing and recording things you see in nature.
Urban Sketching: Sketching (typically outdoors but not always) scenes from observation, with a focus on capturing a moment or story, in an urban environment.
Trail Journaling: Writing and sketching about your experiences in the outdoors.
Supplies
You don’t have to buy expensive products right away (or at all), and often we feel most free with our art when the cost-stakes are low. Don’t let not having the “right” supplies stop you from exploring your creativity!
This is a basic list of supplies to get started with a “line and wash” (waterproof ink with watercolor) style of sketching while on hikes or other outdoor activities. But truly, you could just bring a sketchbook and a pencil. I’ve included the contents of my hiking sketch kit at the end.
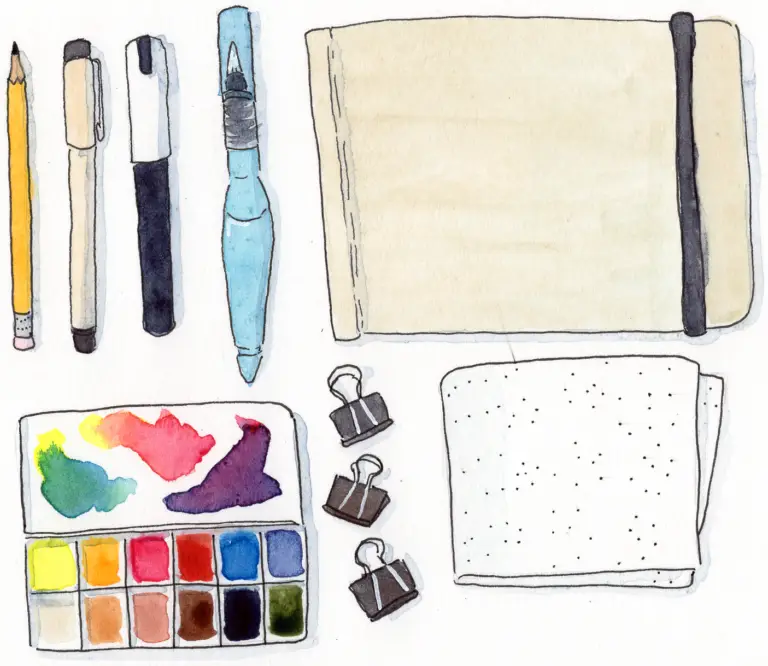
Pencil & eraser
For basic sketch. A regular HB pencil works fine, either wood or mechanical. If you’re craving a fancier pencil, Blackwing are popular. They have rectangular, replaceable erasers that are nice to use. I use the Pearl, which is a softer lead than typical HB pencils.
Black waterproof pen
For drawing over pencil lines and lettering. I also journal with them. Pigma Micron, Faber-Castell Pitt Pens, and Copic Multi Liner are affordable; I recommend sizes 005, 01, 03, or 05 (smaller number = thinner line) to start. Alternatively, you might choose a fountain pen filled with waterproof ink. I like the Pilot Kakuna and the Sailor Fude De Mannen w/ Platinum Carbon Ink.
White gel or paint pen
For adding highlights or white doodles on a dark background. The classic Gelly Roll gel pens work, but I prefer the Uniball Signo as it flows more smoothly. Another good option is a fine tip Posca paint pen.
Water brush
Water brushes are easy and quick to use, making them great for painting watercolors when time is a consideration. The Pentel Aquash brushes are reliable and affordable, and come in 3 different brush sizes (if just getting one, the medium is a good place to start). I also like the Niji water brushes, especially the large flat one.
A travel brush and collapsible cup is a good choice as well, although not as light or quick. There’s also a Leave No Trace consideration with used paint water as some pigments contain heavy metals or toxic chemicals. It is recommended that you bring a spare jar or bottle for carrying out used paint water.
Watercolor paint & palette
You can either buy a palette pre-filled with paints, or buy one with empty pans and fill them with tubed paint yourself. For cohesion, try to limit yourself to 12 or less paint choices. For pre-filled palettes, I recommend either the Winsor & Newton Cotman Watercolor Sketcher’s Pocket Set of 12 (~$20) or the ArtToolkit Explore Palette (prefilled with 12 DaVinci Co watercolors, $65). The only palette I’ve filled myself are the Art Toolkit palettes, which I fill with Daniel Smith watercolors.
More details on paint in the next section.
Sketchbook or paper
Either option works! Sketchbooks are heavier, but provide a stable surface. A5 or smaller fits into most kits well. Loose paper is lighter, but you may need to clip it to a thick board for stability. Handbook Journals by Speedball and Stillman & Birns both make good affordable sketchbooks. I love the Hahnemuhle travel watercolor sketchbooks, as well as their 100% cotton watercolor sketchbooks.
More details on paper in the next section.
2-3 binder clips
For holding sketchbook pages open, clipping paper to a board, or even clipping a light palette to your sketchbook or board.
Paper towel or cloth
For wiping excess paint or water from brush, cleaning brush, or even dabbing up some moisture from your page. A paper towel folded up can easily last a couple of trips, but any absorbent cloth works. Small cotton towels, socks, sponges, or bandanas are common choices.
Supply bag or pouch
For holding it all together and keeping your supplies protected. I used a gallon freezer bag to contain my supplies for over 2 years, reusing the same one for many trips. If you prefer a more organization or want better protection for your supplies, Art Toolkit and Roam Adventure Designs are small US companies that make light and durable products designed to contain your art supplies on the go.
Something to sit on
Even if there could be benches or logs to sit on, a foam sit pad makes a surprising difference in comfort, keeping you dry and warm, and providing a small amount of cushion. If I am backpacking or know I’ll be sitting for an hour or more, I carry an ultralight chair. The comfort is worth packing the extra pound.
Extra water
For you and for painting. Hydration is always important, and its good to have extra water in case your water brushes run dry.
Optional, extra fun stuff
With consideration to pack weight and limited capacity during hikes, try not to add too much in one go. These are things you can add if you decide you’ll use them.
Fine mister
You can use a mister in a couple of ways. The first is for pre-wetting your dry paints. This makes it easier to pick up pigment with your brush. The other is for getting a lot of water onto your page quickly. This is helpful for background washes, or for moving paint around on your page. While your page is still wet, you can tilt it, letting the paint follow the moisture for smooth gradients.
Water-soluble crayons & Graphite
Interesting textures, and can be blended out with a water brush. Consider choosing just 1 or 2 colors to bring.
Colored waterproof pens/ink
Substitute a black pen for a colored one for unique outlines.
Colored pencils
Due to weight, space, and sharpening needs, I don’t bring colored pencils. A small company called With produces an ultralight colored pencil kit that I have heard great things about, but have yet to try myself.
Stamps
I like how stamps look on my sketchbook pages. If I am in a National Park, I try to visit a ranger station to stamp my book. Because of how bulky stamps can be, I don’t bring any with on backpacking trips, but I carry a self-inking date stamp for other excursions.
Supply Notes
Paint
A pre-filled palette is an excellent place to start if you are unfamiliar with watercolor or just want to make things easier. If you desire custom options, you can either purchase individual dried pans of paint, or tubes of wet paint that you fill the pans with yourself. After filling pans, they should be left out to dry for about 24 hours. Art Toolkit has a great post here detailing how to fill pans.
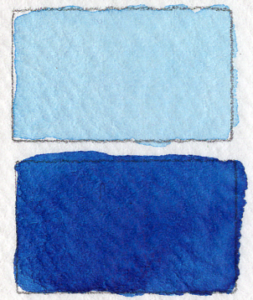
There are many quality brands of watercolor, ranging from mass-produced to handmade, and each one has unique properties. An ultramarine in one brand may not appear the same in another. Some paints “granulate”, meaning the pigment creates textures as it dries. Others use different binders that apply differently. Most companies have “dot cards” available so that you may try the paints before purchasing large quantities. Have fun and experiment!
Student vs Artist Grade Paints
Some supplies like paint or colored pencils are described as either “student” or “artist” grade. Artist grade supplies have higher pigment levels, smooth and reliable application, and better durability. Quality student grade supplies won’t hold you back though. They are meant for learning and cost less.
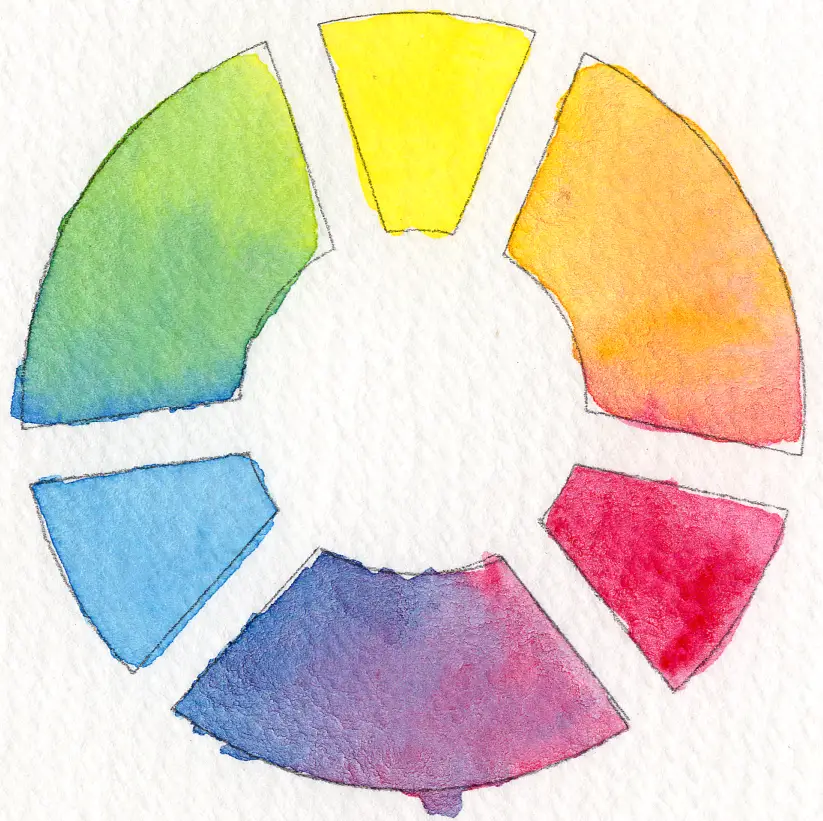
What colors should I bring?
Between 3-12 colors is typical.
You might keep it simple and bring one to three choices for accents and mixing or bring a full range to cover all options. For cohesion, try limiting yourself to 12 or less. A full set typically includes a “warm” and “cool” variant of the primary colors and a few earthy tones.
You can mix every color you really need with just yellow, red, and blue. Adding variants increases your range, but can also lead to muddy sketches. For example, painting a field with trees using three different greens may not look visually unified as mixing a green with yellow and blue, then adding more yellow or blue for different greens.
A note on greens specifically!
I’ve been on a quest to find my “perfect green” since I started painting. Many greens look too vivid for nature straight out of the tube. Adding just a bit of red will tone down the saturation just enough to make it look more natural.
Paper
I use a small, hardbound sketchbook 90% of the time I make art outdoors, but I sometimes carry loose paper as well. I enjoy adding to my book over time and the cover gives me a stable surface, but carrying loose sheets of paper has the benefit of reducing weight. There are many types of paper suitable for travel sketching and making art outdoors. Whatever you choose should be acid-free to prevent discoloration. Cotton paper yields the best watercolor results, but you do not need to use 100% cotton, especially if cost is a consideration. Cellulose or cellulose/cotton blends can be good enough for sketching and cost less, but some watercolor techniques could be a challenge.
Paper “weight” refers to its density, described as “gsm” (grams per square meter) For comparison, standard printer paper is 70-100 gsm.
Dry media (pencil, pen) – Regular sketchbook paper (80+ gsm) is sufficient. If you may want to add a light layer of watercolor, aim for 130+ gsm.
Wet media (Watercolor and other water-soluble mediums) – Mixed media or watercolor sketchbook. Mixed media paper (160+ gsm) is thick enough for to use markers or light layers of watercolor or other water-soluble mediums. Watercolor paper (200+ gsm) can be used with any wet medium, although if using a lot of water or many layers of paint, aim for 300+ gsm.
Hot press or cold press?
If you are painting in watercolor, you will notice paper is typically described as either “hot press” or “cold press”. Hot press papers are smooth and great for ink pens and detailed work. Cold press paper provides more texture and plays well with granulating paints. I recommend starting with cold press paper.
Lastly, if you are going to splurge anywhere in your kit, let it be paper. Even the highest quality paint can fall flat on subpar paper.
My Sketch Kit
I am going to focus on the medium-sized kit I use for hiking and backpacking trips.
Pencils: Pentel GraphGear 500 0.5, Blackwing Pearl
Erasers: Both pencils have good, replaceable erasers.
Pens: Sailor Fude De Mannen w/ Platinum Carbon Ink, plus 01 and 03 Micron pens.
Water brush: Pentel Aquash (fine and medium tips), Niji flat wide brush
White gel pen: Uniball Signo
Paint & Palette: ArtToolkit Explore palette filled with Daniel Smith paints.
Paints (I am still nailing down my ideal selection): Hansa Yellow Light, New Gamboge, Quinacridone Red, Deep Scarlet, Cerulean Blue Chromium, Indanthrone Blue, Buff Titanium, Yellow Ochre, E.F. Red Iron Oxide, E.F. Brown Iron Oxide, Undersea Green, Indigo
Sketchbook: Hahnemuhle Watercolor Sketchbook, 200 gsm, cotton-blend
Binder clips
Mister
Rule of Thirds composition tool (Admittedly mostly used to draw straight lines)
Cotton cloth (cut from an old tea towel)
Pouch: ArtToolkit A5. The ArtToolkit is rugged, I’ve used the same one for years. I also like that it is flat and can slide into the outer pocket of my backpacking bag (readily available = more likely to use). It fits everything on this list with room to spare. If it might rain, I put the ArtToolkit inside a plastic gallon bag.
Something to sit on: I usually bring a closed cell foam sit pad; it fits in the water bottle holder of my backpack. If I know I’ll have a lot of time to paint or I am backpacking, I bring my Helinox Chair Zero instead.
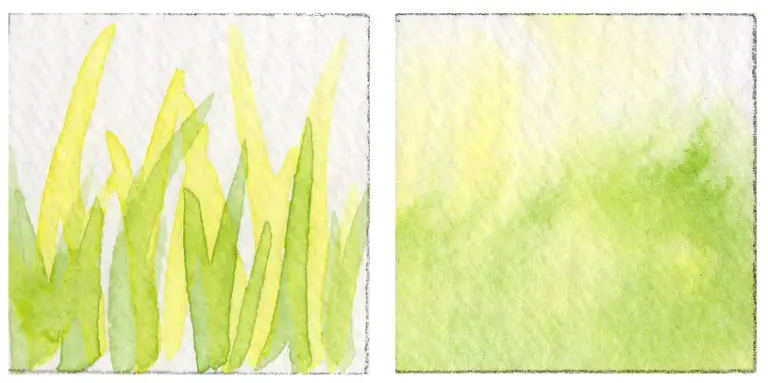
How to use watercolors & a water brush
- Wet dry paint using a mister or water brush.
- Here, you have two options: painting wet paint on dry paper, or wet paint on wet paper.
- a) wet-on-dry: Lightly squeeze brush to moisten the bristles, load the brush with wet paint, dabbing off excess if needed, and apply to dry paper.
- b) wet-on-wet: Either mist or apply clean water with brush to dry paper. Load brush with paint and apply to wet paper. You can also do this on wet paint for different effects.
- If you want to add more layers of paint, dry paint completely before adding layers.
- To clean brush, squeeze water onto your cloth and wipe clean.
Watercolor is meant to be diluted with some amount of water. How much water you use determines how transparent and saturated the color is.
More water = More transparent (good for layering), lighter color, paint moves more
Less water = More opaque and saturated color, paint moves less
Where to sketch?
Everywhere! If it’s too much pressure to try painting on a hike at first, try visiting a local park or nature preserve. A grand vista isn’t necessary for a creative sketch, even the mundane can make great subjects. I look for a spot that is out of the way, preferably shaded.
If you are nervous about sketching in public, try bringing a friend or joining an Urban Sketchers meetup to get started. I’ve yet to have a negative experience sketching in public or on trail. The vast majority of passersby will be indifferent, and the rest are likely to be curious and friendly. Some local places to try:
Lowell-Riverfront Trail, Snohomish
Lord Hill Regional Park, Snohomish
Centennial Trail, Snohomish
Mukilteo Lighthouse Beach, Mukilteo
Brightwater Center, Woodinville
Meadowdale Beach, Edmonds
Edmonds Waterfront, Edmonds
Evergreen Arboretum, Everett
What to sketch?
Follow your interest and curiosity. If a landscape scene is overwhelming, zoom in. Focus on just one interesting tree, or even one single flower or leaf. You can fill a whole page with small sketches, or do a mix of writing and drawing. You could take a scientific approach and gather data like weather, sizes, and quantities, making notes alongside your sketches. Or, you might go abstract and express your emotions in shapes and colors.
If you find yourself halfway through and unhappy with your art, that is normal. Our inner critic can be loud. Most artists go through waves of being unhappy with how a piece is turning out only to step back and be surprised at how much they like it later. Try to save your judgement for the end, and even then, be kind to yourself. Remember the purpose of making art outside is not to make a perfect rendition, but to enrich our memory and experience. If you are REALLY feeling bad about a page, there is nothing stopping you from moving on and starting another. The only rules are the ones you make for yourself.
I’m here, what now?
Stop and take some time to look around. Relax. Notice what stands out to you. Take photos of anything interesting. Let go of making “good” art, you can do that later if you want. This is about the here and now.
Sketchbook ideas
- Sketch of campsite or view from your spot
- Divide the page into smaller boxes for mini landscapes or smaller drawings.
- Make a simple comic about something interesting or funny that happened on your trip.
- Close your eyes and listen for a minute or two. Try to represent the sounds you hear with lines and shapes.
- Sky or weather recording: Make a box and fill it with your observation of the current sky or weather conditions. Noting time and other environmental details is a great addition.
- Map of the trail you’re on with notations and doodles
- Make a large shape, journal inside of it, and decorate the border area.
- Fill a page with sketches of rocks or shells
- Three Sketch Challenge (via Max Romey @TrailboundSketches) 3 sketches, 30 minutes or less per sketch, within 3 miles of home
- Nature Spots (via Lisa Spangler @sideoats): Make one ~1” circle and fill with a color or texture you observed, along with a note identifying it.
Basic Art Tips
If you are fresh to making art, here are a few tips to help you get started. If you want to advance your skills, check out the Resource list at the end.
- Try to divide your landscape into thirds instead of putting the horizon in the middle.
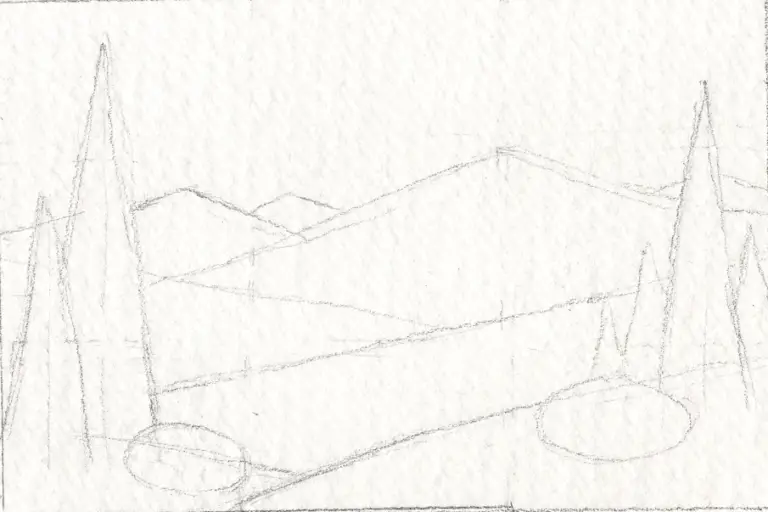
- Start with basic shapes. Lightly draw the outlines in your composition. This helps with proportion and placement.
- You can always add color and lines, but it’s harder to take it away. Start light and build up.
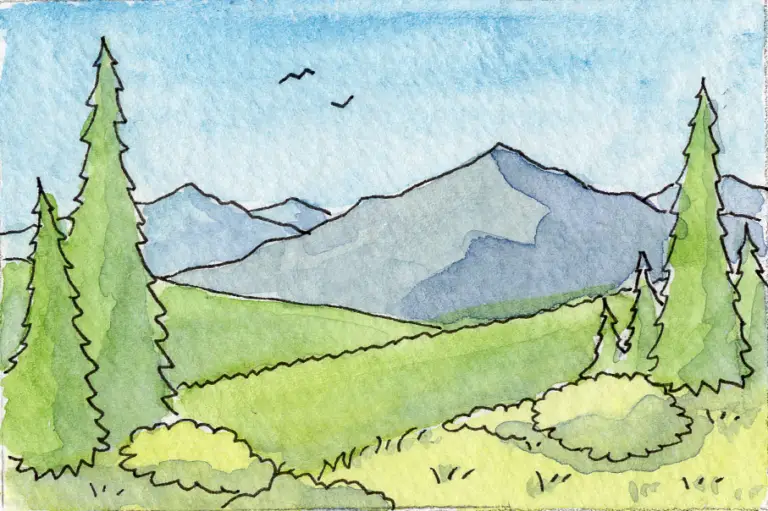
- Use lighter and cooler colors in the background to help it feel further away. More detail and warmth in the foreground will reinforce this.
Line & Wash

Resources
Here are some resources for developing your skills, along with local art supply stores.
Web
Kula Academy: Monthly online creative meetups, online and in-person creative events and workshops
Art Toolkit: Online and in-person art workshops, helpful blog posts
Urban Sketchers Seattle: In-person urban sketching meetups
Trailbound Sketches: Tutorials, livestreams of outdoor sketching, and an active Discord community.
Adventure Art Academy: Monthly step-by-step videos of artist Claire Giordano’s outdoor painting process.
Books
The Laws Guide to Nature Journaling by John Muir Laws
Watercolor in Nature by Rosalie Haizlett
Draw Your World by Samantha Dion Baker
Soul Color by Emma Burleigh
Trees of the West by Molly Hashimoto (see also: Birds of the West, Colors of the West)
Sketch Now, Think Later by Mike Yoshiaki Daikubara
The Urban Sketching Handbook: Color First, Ink Later by Mike Yoshiaki Daikubara
The Urban Sketching Handbook: Spotlight on Nature by Virginia Hein & Gail L. Wong
Local Art Supply Stores
The Art Muse (Woodinville, WA)
ARTspot Edmonds (Edmonds, WA)
Mystic Art Supply (La Connor, WA)
Dakota Art Store (Mount Vernon & Bellingham, WA)
Art Toolkit (Port Townsend, WA)
BLICK (Seattle, WA)
Artist & Craftsman Supply (Seattle, WA)
Michaels (Multiple locations)
Online Art Supply Stores
About Jessica Rayan Art
I grew up in the PNW and am grateful to be raising a family here. I started carrying a sketchbook on hikes in 2019. I was new to backpacking and wanted to journal about my trips creatively. Hundreds of miles later, my sketch kit has joined me on every backpacking trip (plus many day hikes, camp trips, vacations, and even bike rides!) since. Whether it’s doodling around my journal entries or trying to capture a landscape, making art outside has given me so much joy and I hope to inspire others to give it a try.